
Unreal Engine Performance Optimization: The Technical Guide
Unreal Engine Performance Optimization: The Art of Stable FPS
Performance isn’t just about high frame rates—it’s about stability. A game that runs at 144 FPS but hitches every 5 seconds feels worse than a locked 60 FPS experience.
Most developers start optimizing only when the frame rate drops. By then, it’s often too late. This guide focuses on a “Profile-First” approach: identifying where the engine is actually struggling before deleting your high-poly assets.
Optimizing
Optimization is a workflow, not a panic button. Before you “fix” anything, decide:
- Target hardware: VR (90 FPS), PC/Console (60 FPS), Mobile (device-specific).
- Target metrics: stable frame time beats peak FPS.
- What to measure: use built-in profiling commands before changing content.
Quick commands:
Stat FPS: quick framerate readout.Stat Unit: frame breakdown (Game/Draw/GPU).Stat Game: game thread + expensive ticks.Stat SceneRendering: CPU-side rendering costs.
The “Stat Unit” Strategy: Locating the Thief
Before you touch a single shader, you need to know who is stealing your milliseconds. Run the Stat Unit command in the console to see the four Horsemen of Lag:
- Frame: The total age of your frame. If this is 16.6ms, you’re at 60 FPS.
- Game: CPU time spent on your logic (Tick, Blueprints, physics).
- Draw: CPU time spent telling the GPU what to draw (the “Draw Thread”).
- GPU: The actual rendering time on the graphics card.
Taming the GPU
If your GPU time is high, the GPU Visualizer (Ctrl + Shift + ,) is your best friend. It breaks down every pass, from Bloom to Shadows. The Secret Weapon: Use Instanced Static Meshes (ISM). Instead of the CPU telling the GPU to draw 1,000 trees separately, ISM tells it to draw “this tree” 1,000 times in one breath. This drastically lowers CPU overhead in the Draw thread.
The VRAM Trap: Texture & Memory Management
That dreaded “TEXTURE STREAMING POOL OVER” message isn’t a suggestion—it’s a warning that your game is about to start stuttering.
- The Power of Two Rule: Always export textures in 512, 1024, or 2048 dimensions. If it’s not a power of two, the engine can’t generate “Mips” (smaller versions for distant objects), and you’ll waste VRAM.
- Compression Profiles: Set your “Mask” textures to
Mask (no RGB)and Normal maps toNormalmap. Choosing the right profile can reduce texture size by 50% with zero visual loss.
Environment
Collision Prefixes
When importing custom collision from 3D software, use these prefixes for automatic recognition:
UCX_: Convex collision.UBX_: Box collision.USP_: Sphere collision.- Example:
SM_Chaircollision should be namedUCX_SM_Chair_01.
Image Render
For high-quality renders (screenshots or cinematics), start with sane output settings:
- Output format: JPG (fast) or EXR (HDR workflows)
- Frame rate: 24fps (cinematic standard)
- Resolution: 5120x2160 (ultrawide marketing renders)
Then improve clarity with console variables:
r.Tonemapper.Sharpen 0.5(experiment between0and5)
HDR notes (Movie Render Queue):
- Output format: Custom Render Passes -> add Final Image
- Enable Capture Frames in HDR
Technical Rendering Techniques
Auto UV Generation
Proper UVs are essential for lightmaps. While 3D software is preferred, Unreal’s built-in Auto UV tools can generate functional lightmap UVs for complex geometry during the import process.
PSO (Pipeline State Object) Caching
On mobile (Android/Quest), shader compilation during gameplay causes “hitches.” PSO caching compiles these shaders before they are needed.
Step-by-Step Implementation:
- Config: In
Device Profiles, setr.ShaderPipelineCache.Enabledto 1 for your target (e.g., Android). - Settings: In Project Settings, enable “Share Service Material Code”.
- Launch: Launch the game on the device with
-logPSO -NoVerifyGCparameters. - Collect: Play the game to cover all levels and effects.
- Retrieve: Pull the cache using
adb pull /sdcard/UE4Game/YourProject/Saved/CollectedPSOs. - Generate CSV: use
ShaderPipelineCacheTools.exe(in engine binaries) to convert the.rec.upipelinecachefiles into a.stablepc.csv. - Import: Place the
.stablepc.csvinBuild/Android/PipelineCaches. - Rebuild: Package the game. The engine will now pre-compile these shaders at startup.
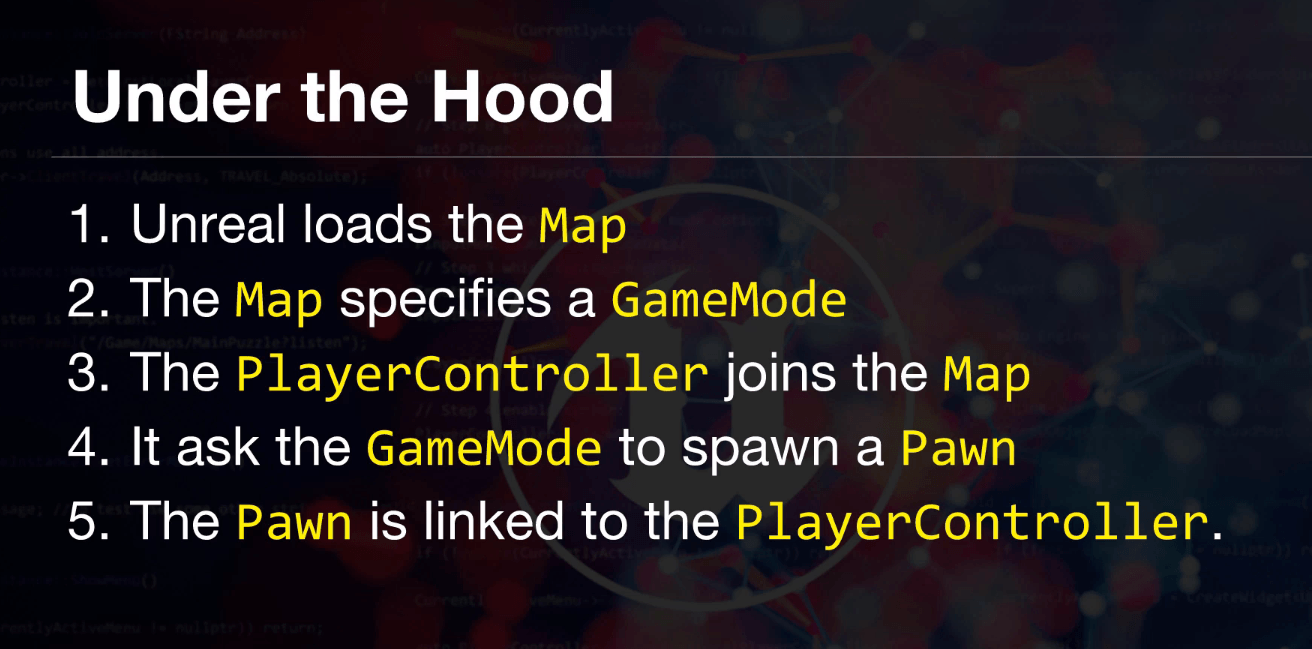
Load Game Hierarchy
Use this as a quick mental model for “what initializes when” and where to store data:
Unreal Engine Diving Levels Course
This method is a simple level streaming workflow for loading/unloading an environment:
- Window -> Levels (open the Levels panel)
- Levels -> New -> select Empty Level -> name it (e.g.,
C0_Sublevel) - Select all meshes -> right-click
C0_Sublevelin the Levels panel -> Move Selected Actors to Level
Now when you click the eye icon, the meshes in that sublevel will hide/unhide.
Loading Screens
Common loading screen approaches:
- Fade to solid color (fastest; avoid keeping users faded for too long)
- VR splash screen (engine-supported, great for XR)
- Stereo layers (most powerful, most work)
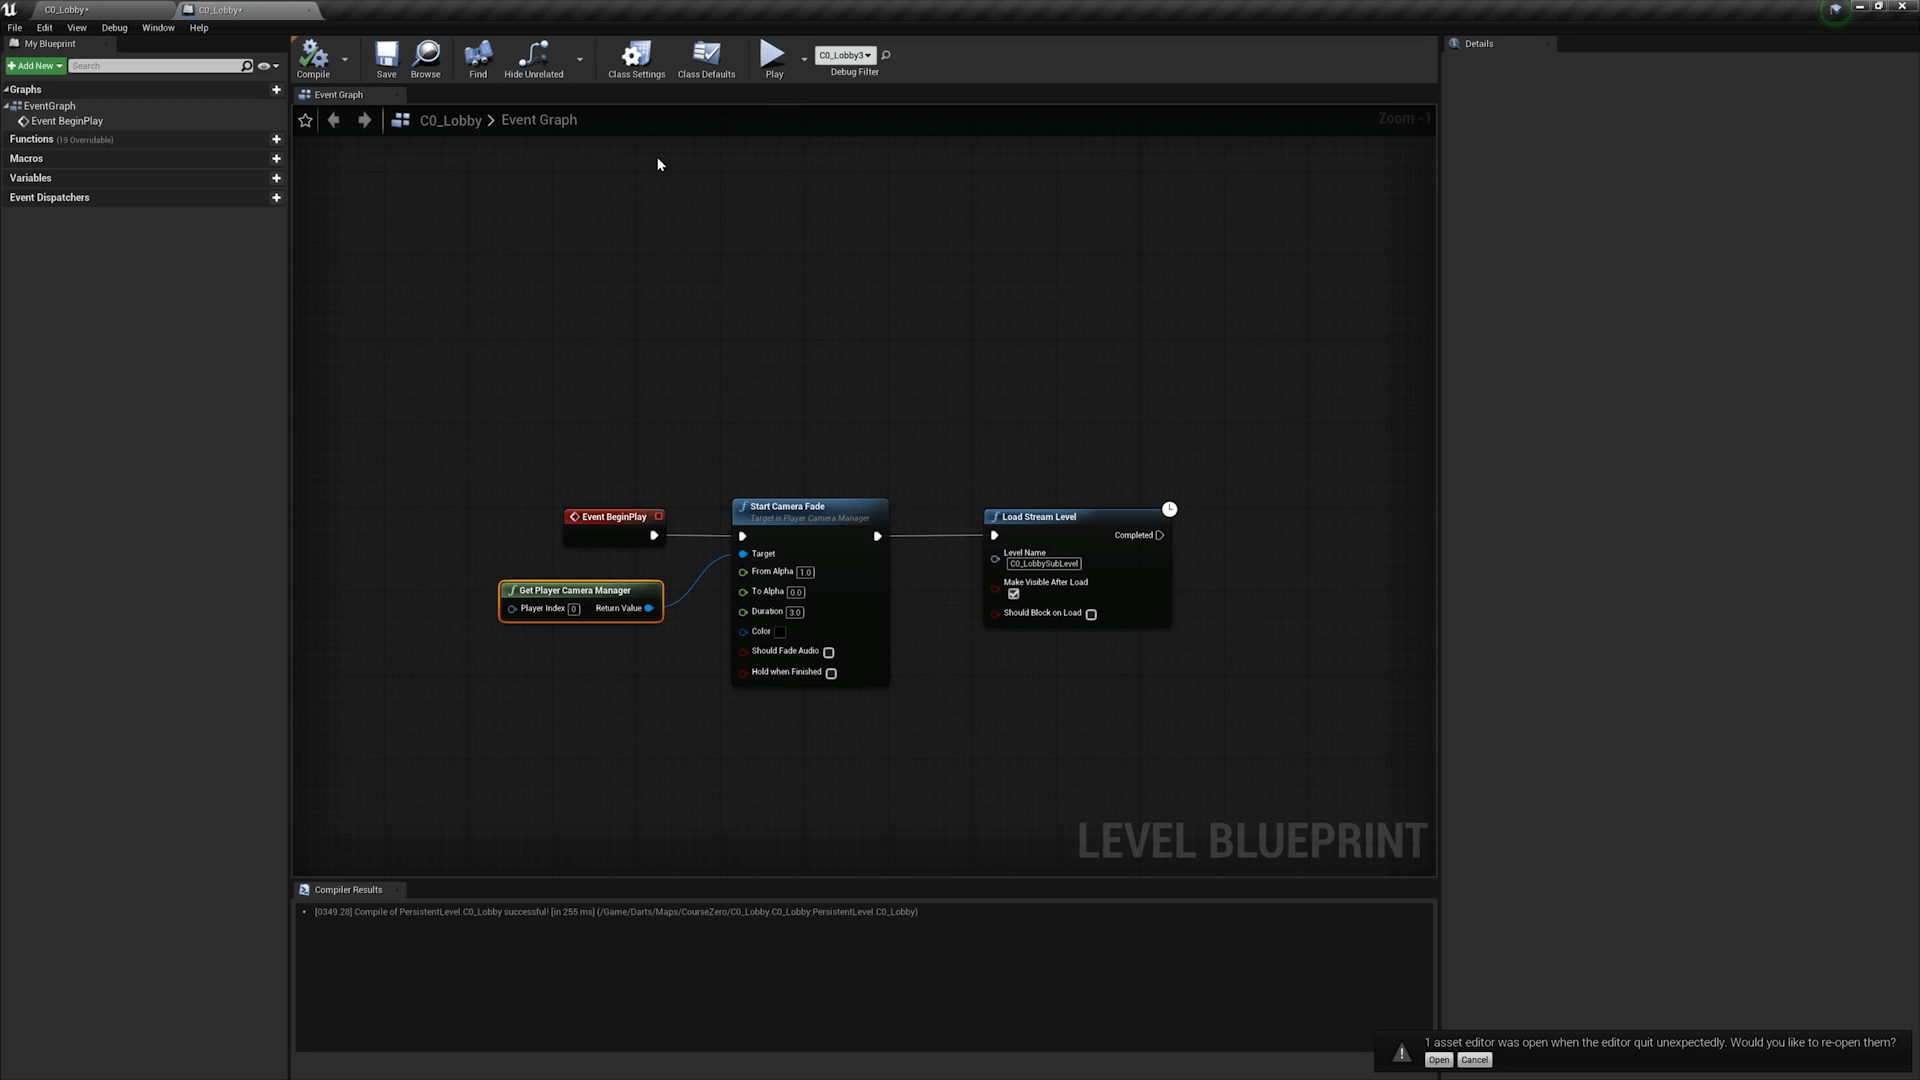
Example fade blueprint:
Advanced Optimization: Jacketing
For large-scale environments, Jacketing (available via plugin) identifies and deletes polygons or entire meshes that are completely occluded from the outside view, significantly reducing triangle counts and draw calls in complex scenes like buildings or vehicles.
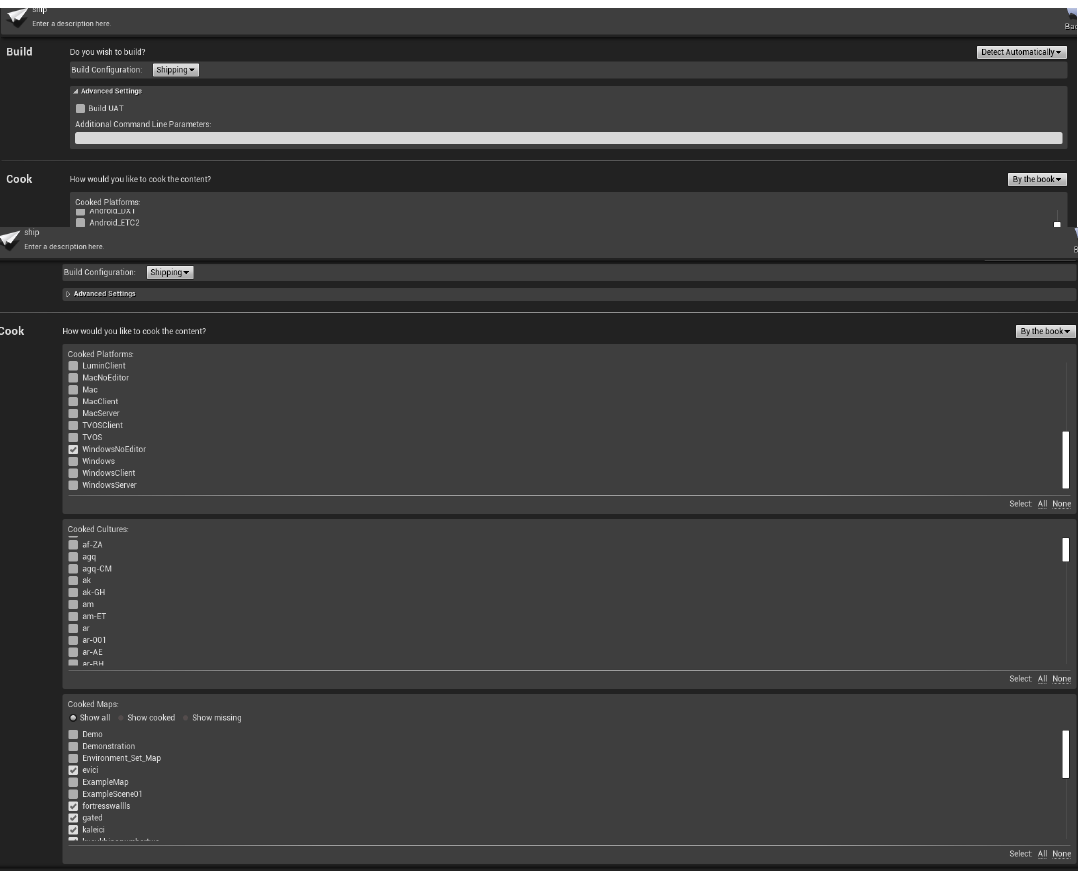
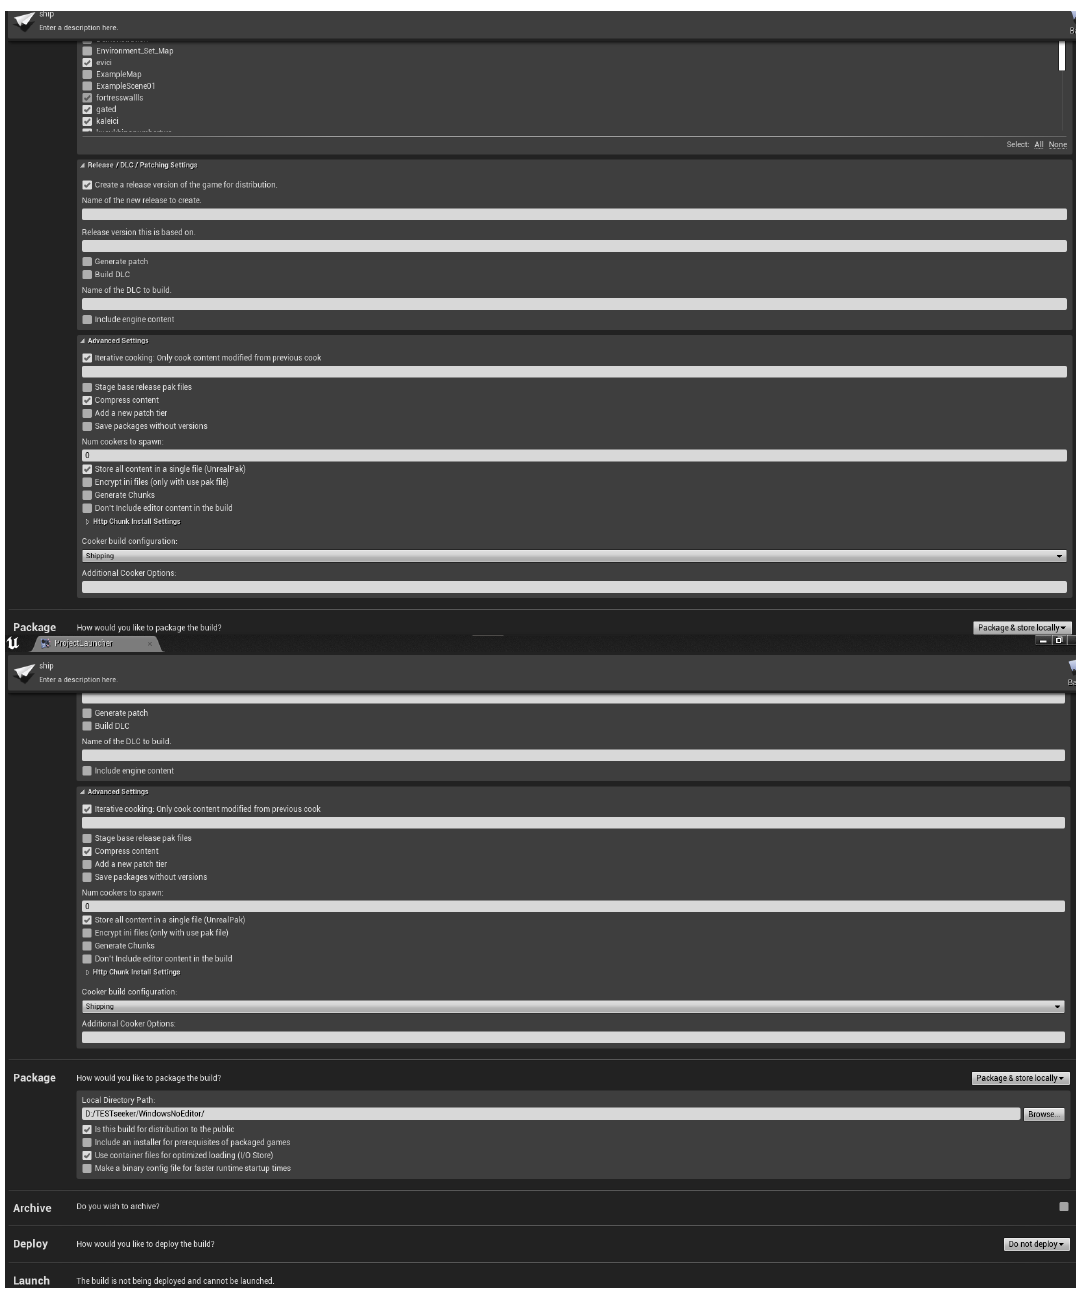
Export Settings
Before shipping, ensure your project settings are optimized for the target platform:
Project Settings screenshots (baseline export settings):
- Culling: Enable “Occlusion Culling” to prevent rendering actors blocked by other geometry.
- LOD Groups: Assign models to “SmallProp” or “LargeProp” to automate triangle reduction distances.
- Ship Mode: Set Build Configuration to
Shippingin Project Settings to remove console overhead and debug symbols.